Fisher & Paykel Healthcare Products

cpap suppliesFisher & Paykel is a major manufacturer of appliances that is currently based in New Zealand. Their products range from kitchen appliances (e.g. dishwashers, refrigerators) to healthcare products tailored for patients suffering from respiratory problems and sleep disorders. This brand is very popular with them being able to market their goods in over 120 countries worldwide.

What do Fisher & Paykel offers?

Fisher & Paykel offers you healthcare products featuring simplicity, style and smart engineering. They are intent on manufacturing products that are efficient and usable whilst able to help in protecting the environment. They never cease to revolutionize their products not just to earn profit but to ensure that their consumers are able to obtain more than what they paid for.

Fisher & Paykel is not only committed in providing products that deliver efficiency, they are also dedicated on educating individuals and the family members regarding obstructive sleep apnea. Indeed, this top of the line multinational company is intent on delivering sound, environmentally friendly and efficient products and services.

Fisher & Paykel products

Fisher & Paykel delivers products for obstructive sleep apnea and acute & respiratory care which include:

  • Oxygen therapy.Their products used in oxygen therapy easily deliver a complete range of oxygen flow and concentration using two elements – that is flow and humidification.
  • Breathing circuits. They also provide breathing circuits intendedto benefit both doctors/technicians and patients.
  • Masks. Fisher & Paykel also offers noninvasive face masks designed to supply humidified gas and controlled air pressure for oxygen and continuous positive airway (CPAP) therapy.
  • CPAP masks. They offer CPAP masks that aim to provide comfort for their patients. These masks are done ergonomically whilst provide you the highest quality of care.
  • CPAP machine. Fisher & Paykel also offers a CPAP machine that delivers numerous invaluable features such as recent technologies, ramping, alarms, efficacy reporting, automatic pressure adjusting, compliance reporting, and leak compensation. These features provide more humidity, comfort and pressure relief.

Female Urinary Catheter Insertion

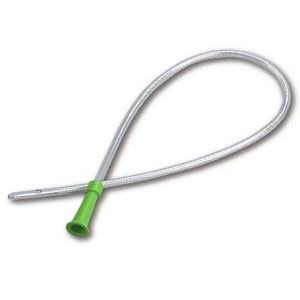
Fcatheters insertionemale catheter insertion is quite a simple procedure. There are however instances when the urinary meatus is difficult to be seen. Hence, it is important to insert the catheter straight into the meatus while making sure that the catheter tip is not contaminated. Whether you are going to insert an intermittent catheter or an indwelling catheter, the procedure is similar when it comes to insertion. A health care professional can easily perform this procedure, nonetheless, it is helpful if somebody is going to assist with the insertion procedure. If you are going to do the insertion alone, you must ensure that everything is opened and ready to use.

The catheter kit contains a sterile glove, KY jelly and povidone swabs. It will also contain a sterile towel with a hole to allow you to maintain a sterile area for the procedure.

In inserting urinary catheter on a female, you will need to perform the following steps:

1)      Ask her to lie flat on her back, bend her knees and pull it apart.

2)      Wear your gloves.

3)      Gently move her labia apart using your non-dominant hand.

4)      If you are unable to see her meatus, put your thumb for half an inch above the clitoris and gently press it in an upward or inward motion.

5)      Once you are able to view the meatus, cleans it with the povidone swabs. Each of these swabs should be used once. Wipe down the sides of the meatus and the middle.

6)      With your dominant hand, get the catheter and dip its tip onto the prepared KY jelly while your non-dominant hand is holding the patient’s labia apart.

7)      Gently insert the catheter tip onto the meatus.

8)      Try to advance the catheter until you see urine backflow.

If the catheter insertion is meant to collect a urine sample, the nurse will do so by placing the urine directly into a sterilized urine bottle. After which, the catheter will be immediately withdrawn. Nonetheless, if the procedure is done using a Foley catheter, expect that it will remain over a period of time, probably within a few days or so. The catheter will then be connected to a drain or collection bag then the nurse will inflate the bulb using sterile water to secure that it is in place.

FACTS on Catheter Associated Urinary Tract Infection (CAUTI)

Some important facts regarding Catheter Associated Urinary Tract Infection (CAUTI) include the following:

  • Amongst the reported hospital acquired infections (HAIs), the most common is urinary tract infections (UTIs). An approximate of 80% of these UTIs is caused by CAUTI.
  • CAUTI can cause infection on operative sites. It is linked to increased death and morbidity rates and is considered to be one of the major causes of bloodstream infections or septicemia.
  • An approximate of 12 to 25% hospitalized patients are inserted with indwelling catheters, about half of these figure are inserted without appropriate reasons or indications.
  • The risk for a catheterized individual to develop CAUTI increases for about 3 to 7% everyday while the indwelling catheter is left in place.
  • Urinary drainage systems, including catheter use are sources of organisms that are antibiotic resistant. These organisms can cause infections that can be passed to other patients as well as on hospital staff.
  • Recent and earlier studies demonstrate that patients who developed CAUTI will have a longer hospital stay. Their expenses also increase as much as $1,000 per case and even more if they develop any complication or if their CAUTI is caused by an antibiotic resistant organism.
  • Studies reveal that an approximate of 40% physicians who are attending to patients with unnecessary indwelling catheters is unaware that they were still in.
  • The Centers for Medicare and Medicaid Services (CMS) eliminated payment for CAUTI complications if an individual develops an infection while being hospitalized.

These facts only show that CAUTI can negatively impact the lives of individuals who develop it. More importantly it increases unnecessary cost for everybody – the healthcare providers as well as the patients.

Cystitis: Bladder Infection & Inflammation in Women

Cystitis is an infection of the bladder that is very common amongst women. The first line of treatment for cystitis includes the use of antibiotics. In some cases, this health condition improves without the need for antibacterial treatment. Additionally, it is immediately treated without significant complications.

What are the symptoms of cystitis?

Typical symptoms of cystitis in women include:

  • Pain upon voiding
  • Frequent passage of urine
  • Pain on your lower tummy
  • Fever
  • Blood in your urine
  • Smelly and cloudy urine

The bacteria on your anus cause most urine infections. These bacteria sometimes travel towards the direction of your urethra further going into your bladder. Other causes of cystitis include chemotherapy and certain chemicals.

Who are at risk of developing cystitis?

Women are eight times more likely to develop cystitis than men do. This is because the tube where the urine passes (urethra) is shorter and nearer to the anus in women as compared to men. Other risk factors include pregnancy, sexual engagement and diabetes mellitus.

How would I know that I am suffering from cystitis?

If you are suffering from any of the abovementioned symptoms, you can seek your doctor’s advice. Your doctor may ask you to collect a urine sample that will be sent to the laboratory. Urine analysis test will help in identifying the type of bacteria that is causing your infection.

Treatment for cystitis

Treatment for cystitis includes the following:

  • Antibiotics – If you are already diagnosed with cystitis, your doctor will prescribe you with antibiotic medication to be taken for three to five days. However, if you have other health condition or if you are pregnant, your doctor may not prescribe you any medication. Oftentimes, your immune system can clear mild cystitis.
  • Ibuprofen or Paracetamol – Paracetamol or ibuprofen can help in relieving the pain as well as lower your temperature if you have fever.

Your doctor may also advise you to drink lots of water to “flush out” the bacteria. Nonetheless, there is no evidence that it can help. Other treatment methods also include drinking cranberry juice or any alkalinizing products such as bicarbonate or potassium citrate.

If your symptoms worsen or if you develop fever and flank pain, you should immediately consult your doctor.

Cystitis is considered a mild illness. Majority of women who develop cystitis improve within the next few days even without undergoing antibiotic therapy. Nonetheless, if your symptoms do not improve despite using antibiotics, you may need to see your doctor and use other types of antibacterial agents. You should also visit your doctor if you are experiencing recurring cystitis.

Cystitis: Bladder Infection & Inflammation in Children

The prevalence of cystitis in children is still unknown. Healthcare providers however are continuously seeing and diagnosing this health condition on younger populations. There is limited information regarding cystitis in children, hence, most of the diagnostic and treatment methods are similar to that of what is being used on adults.

Symptoms of cystitis in children

Symptoms of cystitis in children are similar to that of adults. These symptoms include:

  • Abdominal or pelvic pain
  • Urinary frequency
  • Urinary urgency
  • Muscle pains
  • Allergic reactions
  • Gastrointestinal problems
  • Pain in the vulva

Some children also experiences bedwetting, urinary incontinence and extraordinary urinary frequency

How is cystitis diagnosed in children?

Diagnosis of cystitis in children can be challenging. Hence, it is often made through ruling out other health conditions. Several specialist visitations may be needed before properly identifying bladder infection amongst the younger population. Diagnostic steps include the following:

  • Health history taking
  • Physical examination
  • Urinalysis
  • Urine culture
  • Diagnostics to rule out other health conditions

Other tests that can help in diagnosing cystitis include bladder ultrasound, cystoscopy, hydrodistention, voiding and fluid intake diary, urodynamic testing, validated symptom questionnaires and therapeutic solution testing.

Cystitis treatment in children

The mainstay conservative treatment in children diagnosed with cystitis is dietary management. Other conservative treatment methods include relaxation techniques, yoga and pelvic floor physical therapies.

Intake of low dose standard adult oral medications is also used for treating this condition in children. The dosage is dependent on the discretion of the medical team attending your child. These medications include the following:

  • Hydroxyzine
  • Amitriptyline
  • Pentosanpolysulfate
  • Cimetidine
  • Gabapentin
  • Opioid analgesics

Another treatment method includes bladder instillation of DMSO and therapeutic solutions such as heparin, lidocaine and bicarbonate.

Challenges of cystitis in children

Cystitis can be debilitation to you and your child. Your child may need to miss school for frequent medical specialist visits. They may need extra room breaks because of frequent urination. Additionally, cystitis can be embarrassing which may make your child subject of ridicule and teasing.

What can you do?

Despite the fact that cystitis can be quite a challenge, you can do something for your child. Here is a list of things that you can do.

  • Communicate with your child’s healthcare providers, school nurse, teachers, principal, gym teacher and other people who are directly in contact with your child.
  • Reassure your child that cystitis is a treatable condition.
  • Educate yourself about your child’s condition as well as its treatments.
  • Learn about self-help strategies that may help in easing your child’s manifestations.

CPAP Supplies

cpap maskIf you are suffering from sleep apnea and is currently undergoing continuous positive airway pressure (CPAP) therapy, then this article is a must read! Today, we will be talking about CPAP supplies as well as why and when you need to change it.

CPAP equipment

Your CPAP equipment includes the following:

  • CPAP machine

A CPAP machine is a device that delivers air through tubing which provides a set or fixed air pressure through a mask.

  • CPAP mask

CPAP mask is placed over your nose, mouth or both which delivers the air pressure you need to your upper airways. A mask system includes air tubing and pillows or masks.

  • Humidifier

A humidifier on the other hand moistens the air delivered by your CPAP mask. This can help in preventing side effects of CPAP machine use such as nasal dryness and irritation. Humidifiers are especially helpful if you are being treated with higher air pressure.

Other CPAP machine accessories include your nasal pillows, headgears and cushion.

Why do I need to replace my CPAP supplies?

It is essential that you replace your CPAP supplies as well as your machine accessories to ensure that you are getting the most effective, hygienic and comfy treatment therapy possible. Your CPAP supplies and accessories deteriorate over time even with regular cleaning and utmost care.

Your humidifier and tubing may develop cracks or tears and your cushions, air filter and headgears may wear out over constant use which will make your therapy under satisfactory. Thus, the most effective and easiest way to receive the most favorable treatment is to replace your CPAP supplies and accessories. This may be costly; nonetheless, many insurance providers nowadays cover these replacements. You just need to make a call to learn about these privileges.

When should I replace my CPAP supplies and accessories?

You may replace your CPAP supplies and accessories if it makes you uncomfortable, causes you skin irritation and if you see any discoloration or signs of wear and tear.

After 1 month

You may replace your air filters and pillows and mask cushions after a month.

After 3 months

You may replace your CPAP mask and tubing after 3 months of use.

After 6 months

You may replace your chinstrap, headgear and water chamber after 6 months of regular use.

CPAP Settings

cpap machinesSuccess and failure in using continuous positive airway pressure (CPAP) therapy is most often determined by knowledge, comfortable system and appropriate treatment pressure. Your doctor or your sleep specialist and technicians can help in giving you good education regarding CPAP use. Though most likely prescribed by your sleep doctor, a comfortable system and appropriate treatment pressure depends on how you use your machine and how you cope up with it. To successfully receive the optimal treatment you need, learn more about your CPAP machine and its settings!

CPAP measurement and settings

Common measurement and settings on your CPAP machine include:

  • Positive end expiratory pressure (PEEP)

PEEP is the pressure in your lungs which is higher than the pressure outside your body.

  • Cpap

This is the air pressure being delivered to your airway via CPAP mask without any pause. It utilizes the air flow to create the pressure you need.

  • Fraction of inspired oxygen (FiO2)

FiO2is the percentage or the fraction of oxygen that is being measured. This is being added on the delivered air to increase its oxygen content.

These measurement and settings are being prescribed and titrated by your doctor or your sleep specialist depending on your needs.

What is titration?

Titration simply means adjusting your CPAP machine settings so that it can provide the appropriate treatment pressure you need. Unlike the prescribed medications dosages given by your primary doctor when you’re sick, CPAP therapy needs exact titration or pressure prescription specifically based on your needs. Meaning, you need to undergo an actual titration study which usually requires you to sleep on a sleep clinic for one night. A skilled sleep technician will try to measure your air pressure needs based on your body position, sleep stages and other important factors.

Can I change my CPAP settings?

Yes, you can definitely change the settings of your CPAP machine! However, it would be better that you consult your doctor first and try to learn the ropes of changing your CPAP settings as these measurements depends on the CPAP machine model and brand.

CPAP Pillows

After being diagnosed with sleep apnea, you will surely have difficulty getting used to your CPAP machine on your first few days or first weeks. But don’t fret, you will be able to get used to it in no time! With the use of CPAP pillows, you will surely receive the relief you need.

What are CPAP pillows?

Unlike your typical pillows, CPAP pillows are specifically designed for individuals using CPAP therapy on their sleep. Most models have unique cutouts which actually help in decreasing the discomfort typically experienced by CPAP users.

What are the advantages of CPAP pillow use?

CPAP pillow use is highly beneficial for CPAP users who are stomach or side sleepers. These benefits include:

Improved CPAP use

The unique cutouts present in almost all CPAP pillows decreases the likelihood of pushing your CPAP mask out of place whenever you move while asleep.

Decrease mask discomfort

CPAP pillows decreases mask discomfort as you will not need to over tighten the straps on your CPAP mask to prevent leaks.

Reduces mask leaks, pressure and strap marks

Since you won’t need to over tighten your CPAP straps, there will be reduced mask leaks pressure and strap marks on your face.

Improved sleep

With your own CPAP pillow, you won’t need to wake up every now and then just to adjust your mask straps or seal the leaks which will surely help in providing you an enhanced night sleep.

CPAP compliance

CPAP pillow use may help increase your compliance to CPAP therapy because of the comfort and benefits it delivers.

Other benefits

Other benefits that you should consider include:

  • Spine alignment
  • Neck support
  • Airway alignment

With the use of CPAP pillows, we guarantee you all these benefits. Add to that, is an IMPROVED overall quality of life!

Catheter Insertion in Men

catherters insertion,Urinary catheterization is a type of procedure primarily aimed to drain urine from the bladder or to collect a sample sterile urine. Health care professionals should insert some types of male urinary catheters; nonetheless, you can do catheter self-insertion in a sterile and safe environment. The instruction given below may help in serving as your guide for self-catheterization. We recommend however that you let your primary health care provider to demonstrate the insertion process before attempting to do it yourself. Additionally, you should bear in mind that there are different varieties of male catheters requiring different insertion techniques.

It is critical that you ensure sterility of your work area as well as your instruments during the whole procedure when attempting to perform self-insertion of a urinary catheter. Your bladder and urethra are sterile areas. Hence, not properly cleansing your genitals or using a contaminated catheter may introduce opportunistic bacteria that may cause urinary tract infections.

In initiating the male urinary catheterization procedure, use sterile gloves and follow the steps below.

1)      Retract the foreskin of the penis.

2)      Dilate the prepuce to expose the urethra.

3)      Cleanse the urethral with aseptic swabs.

4)      Anesthetic gel may be introduced onto the glans penis and urethra to decrease discomfort.

5)      Lubricate the catheter (about 8 inches).

6)      Straighten the urethra by grasping the penis, pulling it into an upward position.

7)      Insert the lubricated catheter into the penis whilst making sure that you are inserting it in a smooth, continuous motion.

8)      Advance the urinary catheter forward until you see urine backflow.

9)      Collect the urine specimen or drain the bladder into a container or drainage bag.

If you are inserting a male Foley or indwelling catheter, you should advance the tubing for 2 more inches after seeing urine backflow. This is to ensure that the balloon is in the bladder. You can now inflate the balloon using a sterile water to anchor the catheter in place. Connect the catheter in a drainage bag and attach or fasten it to the patient’s outer thigh. You should slightly curve the catheter tubing using a tape or hypoallergenic adhesive device.

Other types of male catheters are available. These include internal and external catheters as well as disposable and reusable ones. Internal catheters include those that can be retained in the bladder over a period of time to drain urine or those that are referred to as “in and out” catheters.

Caring for Your Suprapubic Catheter

suprapubic catheters,A suprapubic catheter is a germ-free tube that drains urine out of your bladder. It is inserted through an opening on your abdomen (stoma) and into your bladder. Suprapubic means that the urinary catheter is inserted into your body above the pubic bone. Urinary catheters are used when you experience difficulties with your urination due to some health conditions.

What is a closed drainage system?

The drainage system is comprised of your sterile urine drainage bag and your suprapubic catheter that forms a pathway going from the catheter tip in your bladder towards your urine bag. This creates a closed drainage system where there are no disconnections or leaks. Normally, your urinary system is a is sterile and closed to prevent microbes from entering it.

Importance of taking care of your drainage bag and catheter

Infections from urinary catheters are very common which can lead to severe medical conditions and even death. Hence, it is critical that you take care of your urinary catheter and drainage bag. To prevent infections, you should:

  • Drink at least 8 to 12 cups of liquids every day.
  • Wash your hands before and after handling your catheter and drainage bag.
  • Ensure that you perform proper care and cleaning on your catheter.
  • Be knowledgeable on how long your catheter can stay in place.
  • Keep your catheter drainage system closed all the time except when replacing it.
  • Ensure that the catheter tubing is properly secured on your leg.
  • Always perform proper hand hygiene.
  • Position the drainage bag as well as the urine bag properly. Make sure that there are no loops or kinks on your tubing. Keep your urine bag below the waist level and off the floor.
  • Empty your urine bag only as needed or at least every 3 to 6 hours or when it is half to 2/2 full.
  • Clean and replace the urine bag as instructed by your doctor.

How to take care of my drainage bag

  • Always perform proper hand hygiene.
  • Position the drainage bag as well as the urine bag properly. Make sure that there are no loops or kinks on your tubing. Keep your urine bag below the waist level and off the floor.
  • Empty your urine bag only as needed or at least every 3 to 6 hours or when it is half to 2/2 full.
  • Clean and replace the urine bag as instructed by your doctor.

How to clean your stoma

To clean your stoma, you should:

  • Gather the items you need including soap, warm water, sterile gauze, clean towel, gauze bandage, medical gloves, and waste bin.
  • Wash your hands.
  • Put on your clean gloves.
  • Remove the old bandage gently.
  • Assess the catheter site for redness, swelling, drainage and skin injuries. Report any unwanted changes on your healthcare provider.
  • Throw away your used gloves, wash your hands and ten put on another pair of gloves,
  • Hold the tip of the catheter near the insertion site.
  • Wipe the catheter with sterile gauze to remove blood or any other material. Start at the area near your stoma and wipe away from it.
  • Clean the skin around the stoma in a circular motion.
  • Pat the area gently.
  • Throw your used gloves and wash your hands.
  • Apply a new bandage.
  • Secure the tubing with a tape. Ensure that there are no kinks or loops on the tubing.

How to change your catheter

You may need to change your catheter every after 4 to 6 weeks. To do this, you should:

  • Wash your hands with water and soap.
  • Prepare your sterile supplies – new catheter kit which includes the catheter, gel lubricant, syringe, gloves, and sterile water. You should also prepare anesthesia, bandages and tape.
  • Ensure that the tip of your new catheter is already lubricated.
  • Put on two pairs of gloves – one over the other.
  • Clean the area around your catheter site with a sterile solution.
  • Deflate the balloon with one of your prepared syringes.
  • Slowly remove the old catheter.
  • Remove the top pair of gloves.
  • Insert the new catheter as far as the old catheter was placed.
  • Wait for your urine to flow, which may take a few minutes.
  • Inflate the balloon using sterile water (5 to 8 ml).
  • Attach the drainage bag.

If you are having difficulties in changing your catheter, you should call your doctor immediately.

What problems may occur with changing my catheter and what should I do?

  • Catheter is not coming out easily during replacing it. If this happens, you may need to use another type of catheter. You should also tell your doctor about this.
  • Not able to insert the new catheter.If you are unableto insert the new catheter, immediately cover your stoma with a sterile gauze and call your doctor right away.
  • Catheter balloon is in the wrong place. If it is not inserted deep enough, insert more of the catheter and fill the balloon again. If it is inserted to deep, try to pull it out slowly until you are in the right place.
  • The catheter comes out accidentally. If this occurs, insert a new catheter.
  • Loss of stoma.Your stoma will close after 5 to 10 minutes if there is no catheter in it. Immediately put on a new catheter, if not, immediately seek care.
  • Blocked catheter.Ensure that there are no leaks or kinks. Increase the amount of your oral fluid intake.
  • Tissue overgrowth around your stoma.Prevent this by moving the catheter around to reduce pressure.
  • Lower abdominal pain
  • Urine leakage on your urethra or around your stoma
  • No urine output

What other complications may occur?

  • The catheter comes out accidentally. If this occurs, insert a new catheter.
  • Loss of stoma.Your stoma will close after 5 to 10 minutes if there is no catheter in it. Immediately put on a new catheter, if not, immediately seek care.
  • Blocked catheter.Ensure that there are no leaks or kinks. Increase the amount of your oral fluid intake.
  • Tissue overgrowth around your stoma.Prevent this by moving the catheter around to reduce pressure.

Signs and symptoms of catheter problems

  • Lower abdominal pain
  • Urine leakage on your urethra or around your stoma
  • No urine output

When should I call my doctor?

Call your doctor when:

  • You are having a fever.
  • You notice changes on your urine – its smell and color.
  • You notice urine leakage.
  • You notice that there is skin overgrowth around your stoma.
  • The closed drainage system has accidentally opened.
  • Your catheter appeared blocked.
  • You notice that you have less urine than usual.
  • The catheter accidentally comes out and you are not able to replace it immediately.
  • Your insertion site have pus, blood, pus and redness.
  • You experience pain on your lower abdomen, pelvis, back or hip.

When to seek immediate help

  • You notice that you have less urine than usual.
  • The catheter accidentally comes out and you are not able to replace it immediately.
  • Your insertion site have pus, blood, pus and redness.
  • You experience pain on your lower abdomen, pelvis, back or hip.